Lemon Amigurumi Pattern: A Cute Crochet Lemon With a Leaf
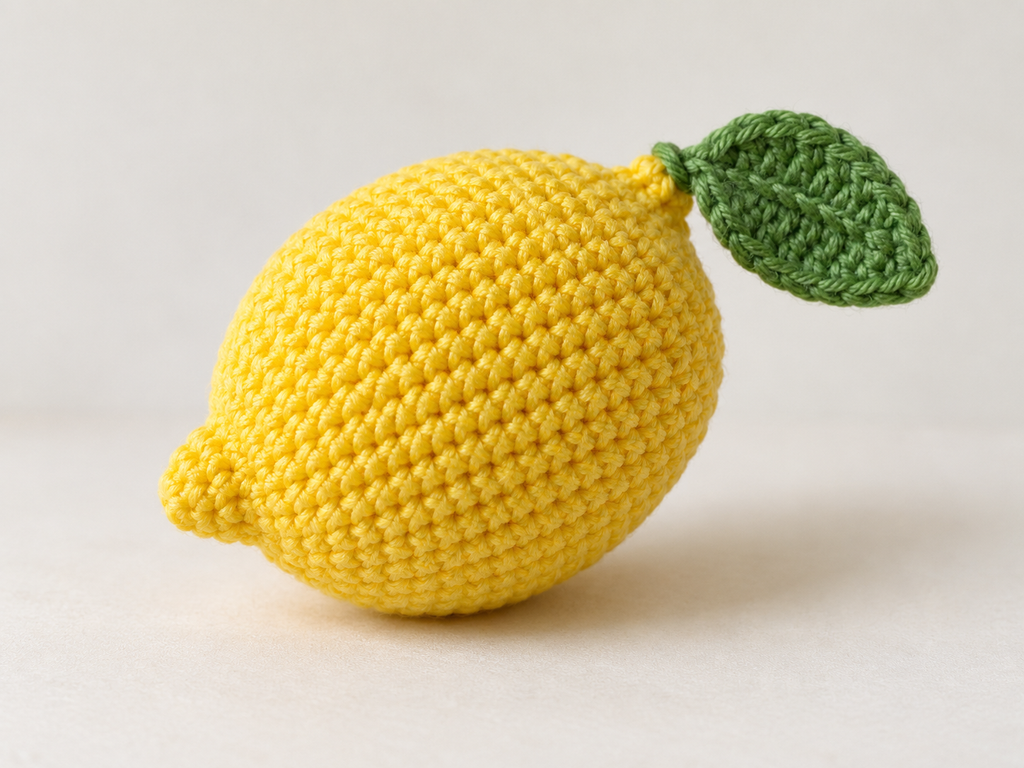
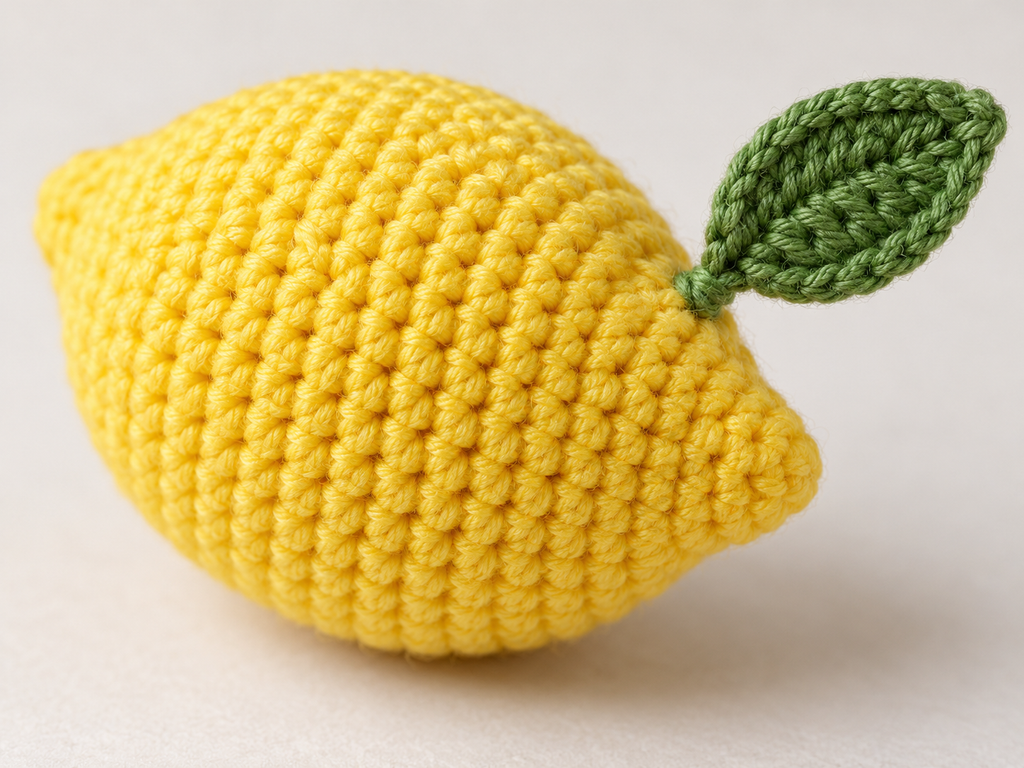
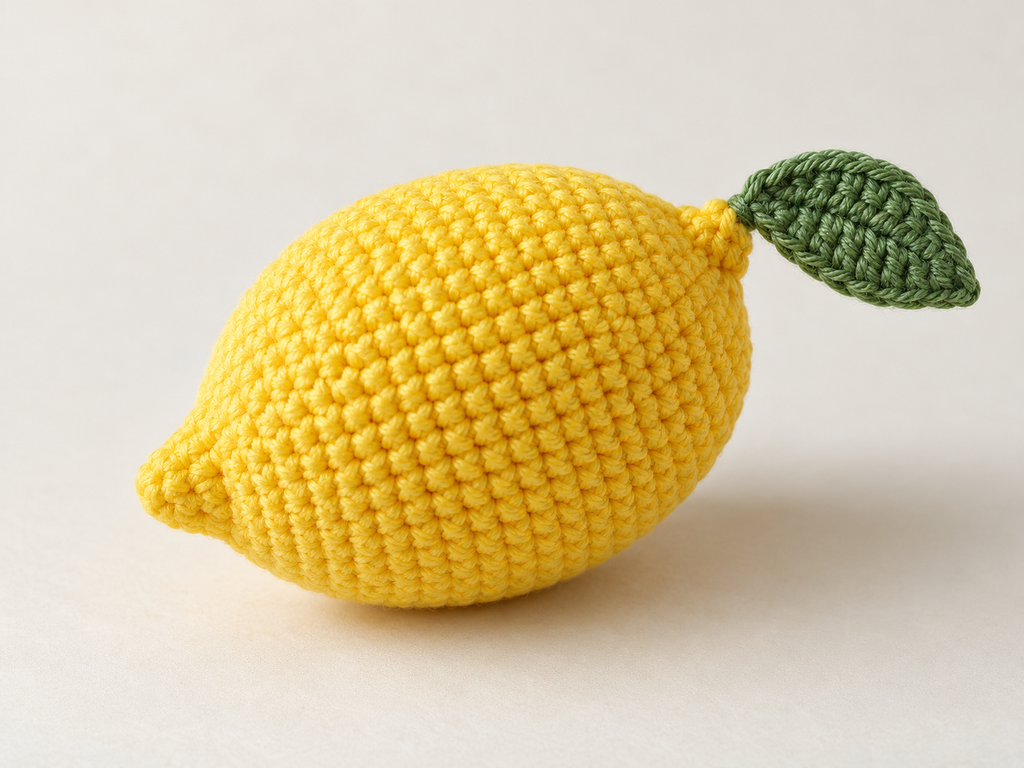
A little yellow lemon makes a cheerful addition to a crochet fruit collection. This lemon amigurumi pattern pairs a simple stuffed body with a small green leaf, creating a project you can customize with different yarn colors or an embroidered face.
The lemon body is worked in continuous rounds. The leaf is made separately and sewn onto one end. Most of the project uses single crochet, with increases and decreases creating the rounded middle and tapered tips.
Pattern status: This is an untested pattern draft. Its finished shape, dimensions and material requirements still need confirmation through a crocheted sample.
Project Details
| Detail | Information |
|---|---|
| Skill level | Beginner with experience working in rounds |
| Terminology | US crochet terms |
| Construction | Stuffed lemon body with a separately attached leaf |
| Main techniques | Magic ring, single crochet, increases and decreases |
| Finished size | Depends on yarn and tension; measurements pending testing |
Materials
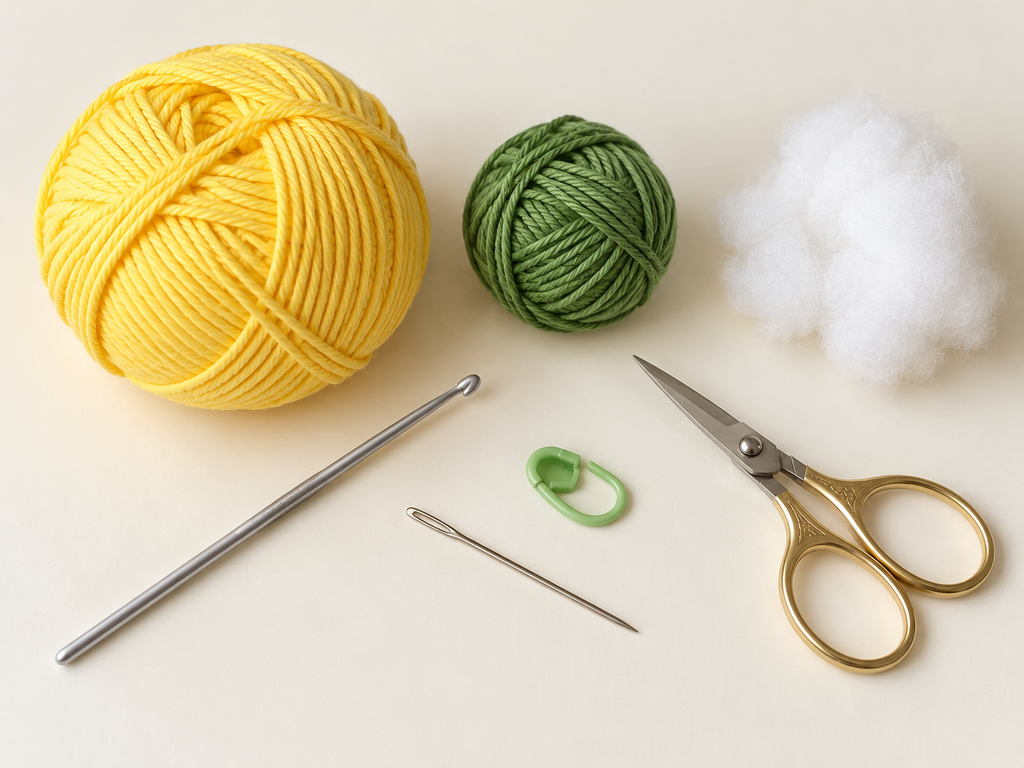
- Yellow yarn for the lemon
- Green yarn for the leaf
- A crochet hook suitable for your chosen yarn
- Polyester fiberfill
- Stitch marker
- Yarn needle
- Scissors
- Optional black embroidery thread for a face
For a first sample, try smooth DK-weight cotton yarn with a 2.5 mm hook. Adjust the hook size if you can see stuffing through the stitches. The fabric should be firm enough to hold the filling while remaining comfortable to crochet.
Use the same yarn weight for the body and leaf.
Crochet Abbreviations
| Abbreviation | Meaning |
|---|---|
| MR | Magic ring |
| ch | Chain |
| sc | Single crochet |
| hdc | Half double crochet |
| dc | Double crochet |
| sl st | Slip stitch |
| inc | Work 2 single crochets in the same stitch |
| dec | Decrease 2 stitches into 1 |
| st | Stitch |
Instructions in parentheses are repeated the stated number of times. The number in brackets is the stitch count at the end of the round.
For the body decreases, an invisible decrease can give a smoother finish: insert your hook through the front loops of the next two stitches, yarn over and pull through both front loops, then yarn over and pull through the remaining two loops.
Before You Begin
Work the lemon body in a continuous spiral. Do not join the rounds or chain between them.
Place a marker in the first stitch of each round and move it as you progress. Count your stitches after each increase or decrease round.
Leave a starting tail long enough to secure the magic ring and weave in later.
Lemon Body
Using yellow yarn:
| Round | Instructions | Stitch count |
|---|---|---|
| 1 | Work 4 sc into a MR | 4 |
| 2 | Sc in each stitch around | 4 |
| 3 | Inc in each stitch around | 8 |
| 4 | (1 sc, inc) × 4 | 12 |
| 5 | (1 sc, inc) × 6 | 18 |
| 6 | (2 sc, inc) × 6 | 24 |
| 7 | (3 sc, inc) × 6 | 30 |
| 8 | (4 sc, inc) × 6 | 36 |
| 9–14 | Sc in each stitch around for 6 rounds | 36 |
| 15 | (4 sc, dec) × 6 | 30 |
| 16 | (3 sc, dec) × 6 | 24 |
| 17 | (2 sc, dec) × 6 | 18 |
| 18 | (1 sc, dec) × 6 | 12 |
| 19 | (1 sc, dec) × 4 | 8 |
| 20 | Dec × 4 | 4 |
| 21 | Sc in each stitch around | 4 |
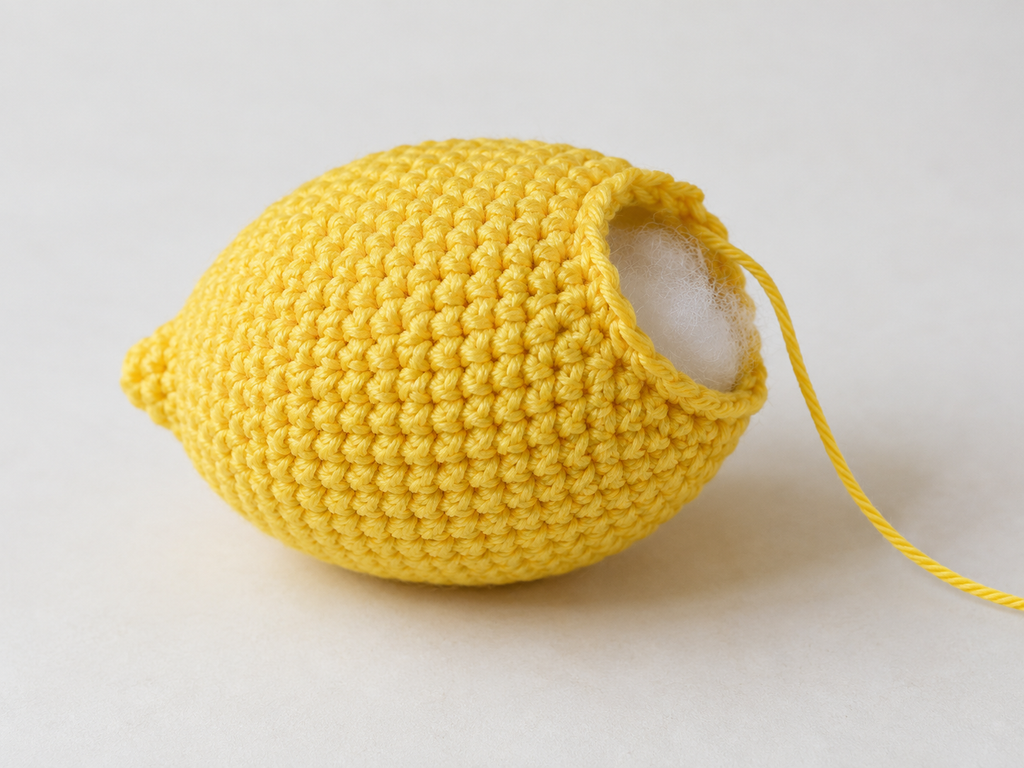
Begin stuffing after Round 17. Add small amounts of filling, distributing it through the center and gently into the starting tip. Finish stuffing before Round 20 closes the opening further.
Keep the middle rounded without stretching the stitches. Gently shape the body into an oval between your fingers.
After Round 21, cut the yarn, leaving a tail. Thread it through the front loops of the remaining four stitches, pull the opening closed and secure the end. Weave the tail into the body.
Green Leaf
Using green yarn:
- Ch 7.
- Starting in the second chain from the hook, work: 1 sc, 1 hdc, 1 dc, 1 dc, 1 hdc, 1 sc.
- Ch 1. Rotate the piece so you can work along the unused loops on the opposite side of the foundation chain.
- Working back toward the starting end, make: 1 sc, 1 hdc, 1 dc, 1 dc, 1 hdc, 1 sc.
- Sl st into the first sc to close the leaf outline.
You should have 12 stitches around the leaf, excluding the turning chain and joining slip stitch.
Fasten off, leaving a tail for attaching the leaf. Weave in the starting tail.
Attach the Leaf
Position one end of the leaf beside the lemon’s closing tip. Sew through the leaf base and several stitches of the lemon body.
Secure the base while leaving the rest of the leaf free. Weave the remaining tail into the lemon.
Optional Embroidered Face
For a character-style lemon, add two small embroidered eyes and a curved smile.
Embroider the face before the body is fully stuffed and closed, so you can access the inside to secure the thread. Position the features on the broad middle section, away from the tapered tips.
A plain lemon also works well alongside other crocheted fruit.
Tips for a Neat Finish
- Check the stitch count. An extra increase can change the shape.
- Stuff gradually. Small pieces of filling are easier to distribute evenly.
- Keep tension consistent. Tightening only the decrease rounds can create an uneven surface.
- Secure the leaf carefully. Use several small stitches through its base.
- Photograph your sample. Check the front, side and end views before finalizing the pattern.
Frequently Asked Questions
Can I use a different yarn weight?
Yes, but the finished size and texture will change. Choose a hook that produces a dense fabric, and use matching yarn weights for the body and leaf.
Is this a no-sew pattern?
The lemon body is made in one piece, but the leaf is sewn on. Describe it as a pattern with minimal sewing.
Can I make it without a face?
Yes. The face is optional and does not affect the body instructions.
Why does my lemon look too round?
Check that you worked the correct number of middle rounds and did not overstuff it. The intended oval shape still needs confirmation through sample testing.
Add It to Your Crochet Fruit Collection
Pair your finished lemon with other fruit designs to create a colorful display or a coordinated handmade collection. Once the sample has been tested, record its measurements and yarn usage so other makers know what to expect.
Looking for more inspiration? Browse all crochet patterns →