Cherry Amigurumi Pattern: Cute Crochet Cherries With a Leaf
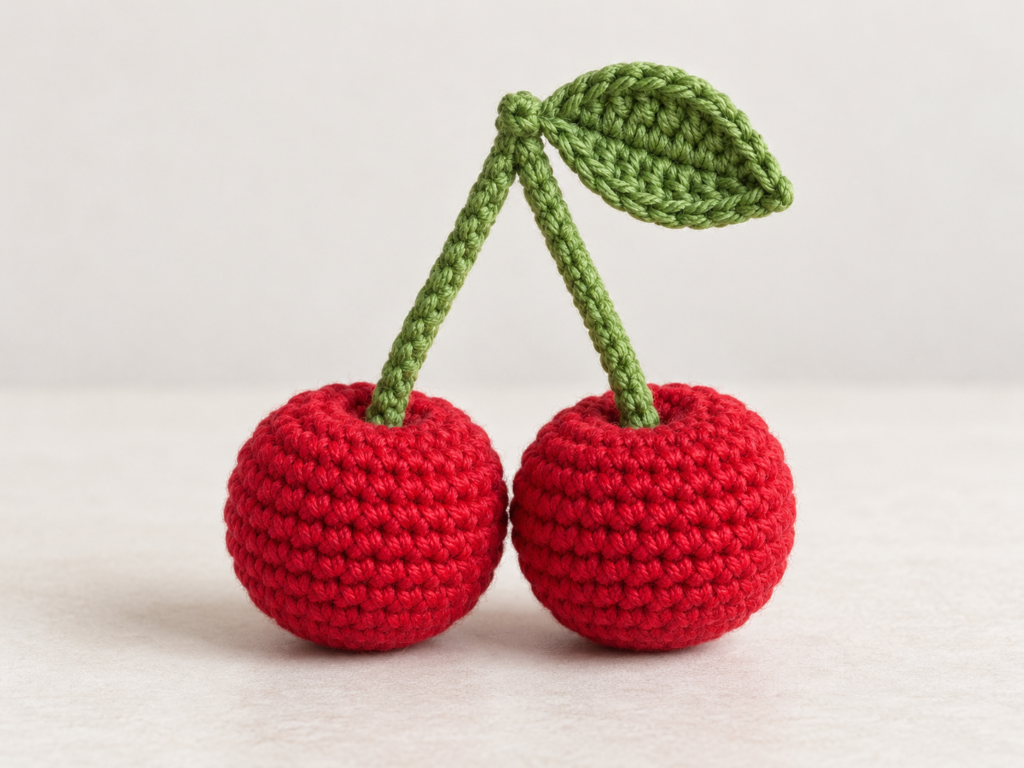
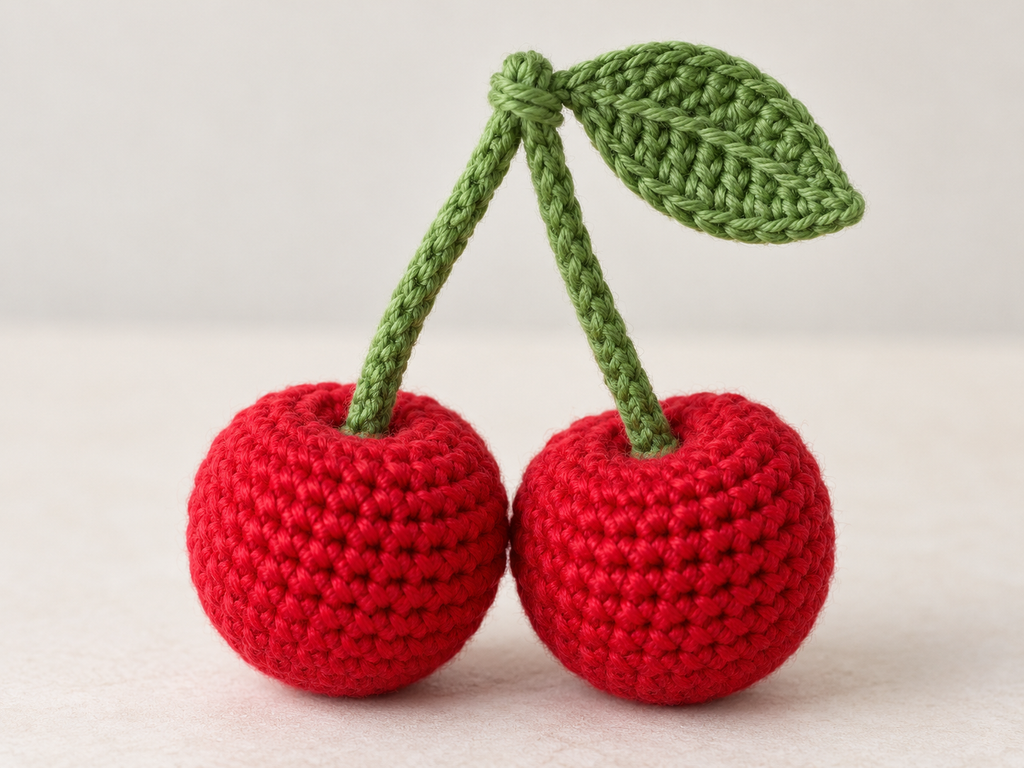
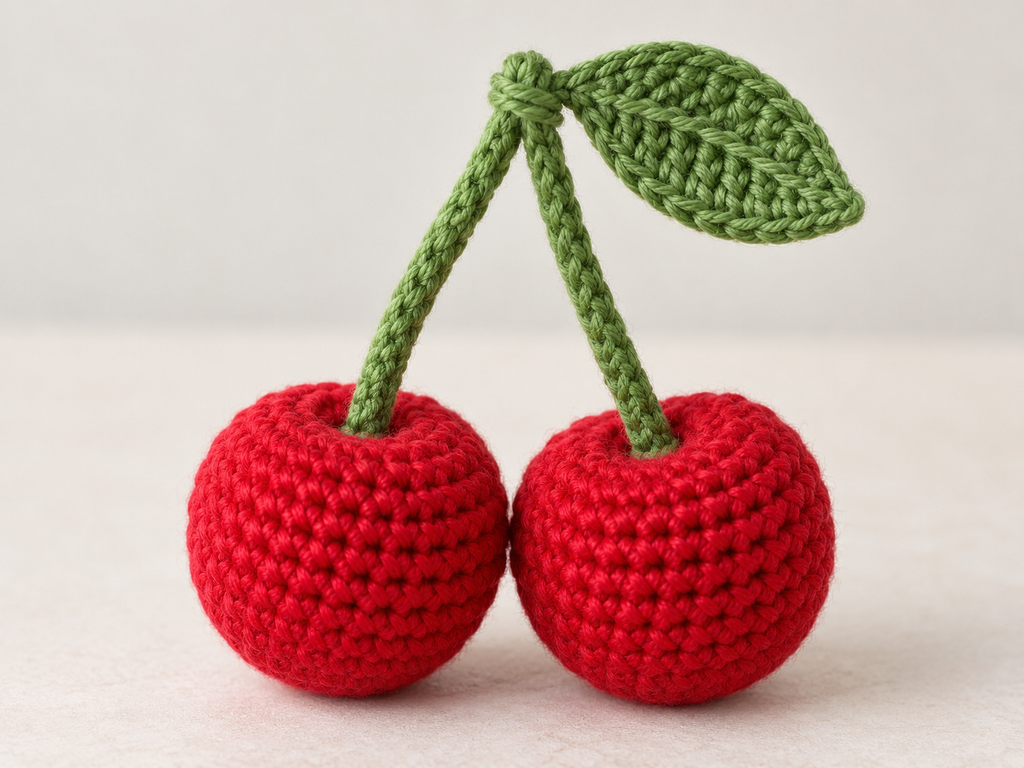
Two little red cherries, joined by green stems and finished with a leaf, make a cheerful addition to your crochet fruit collection. This cherry amigurumi pattern uses simple shaping to create the stuffed fruit, followed by narrow crocheted stems and a separately attached leaf.
Make a matching pair in bright red, or choose burgundy yarn for a darker cherry color. You can also make one cherry on its own.
Pattern status: Untested draft. Finished measurements and material requirements are pending sample testing.
Project Details
| Detail | Information |
|---|---|
| Skill level | Beginner with experience working in rounds |
| Terminology | US crochet terms |
| Construction | Two stuffed cherries, two stems and one leaf |
| Main techniques | Magic ring, single crochet, increases, decreases and sewing |
| Finished size | Depends on yarn and tension; pending testing |
Materials
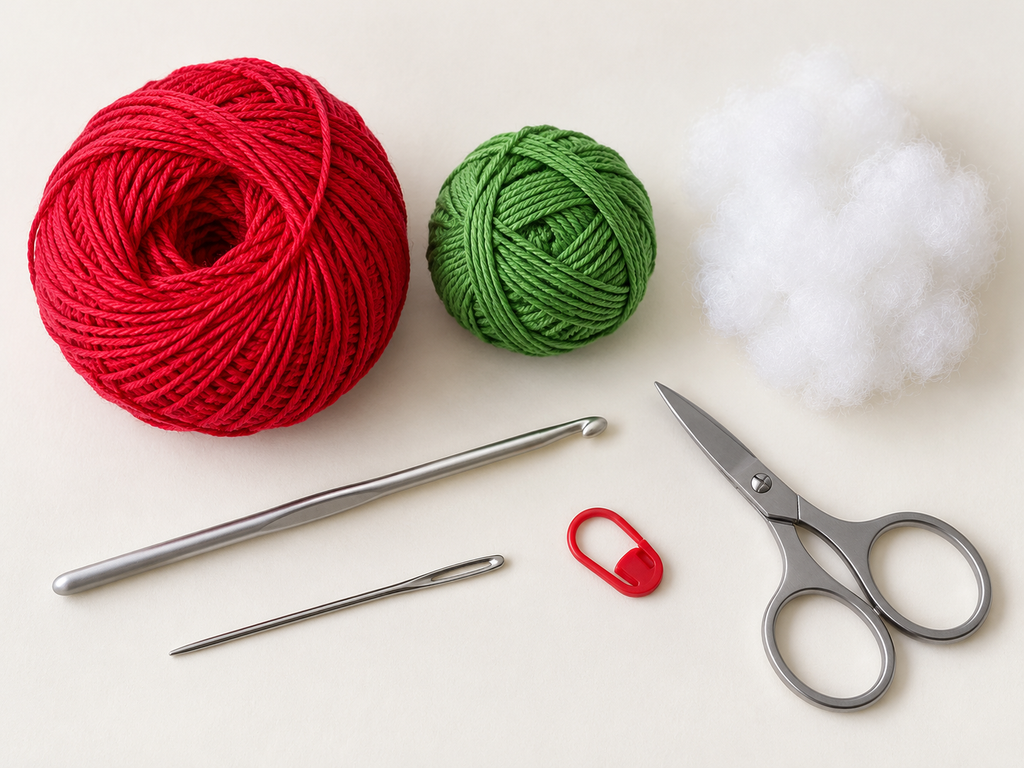
- Red yarn for the cherries
- Green yarn for the stems and leaf
- Crochet hook suitable for your yarn
- Polyester fiberfill
- Stitch marker
- Yarn needle
- Scissors
For a first sample, try smooth DK-weight cotton yarn and a 2.5 mm hook. Adjust the hook size if necessary to make a firm fabric that keeps the stuffing inside.
Use the same yarn weight for all parts.
Crochet Abbreviations
| Abbreviation | Meaning |
|---|---|
| MR | Magic ring |
| ch | Chain |
| sc | Single crochet |
| hdc | Half double crochet |
| dc | Double crochet |
| sl st | Slip stitch |
| inc | Work 2 sc in the same stitch |
| dec | Decrease 2 stitches into 1 |
| st | Stitch |
Repeat instructions in parentheses the stated number of times. Numbers in brackets show the stitch count at the end of each round.
An invisible decrease can help keep the fruit surface smooth: insert your hook through the front loops of the next two stitches, yarn over and pull through both front loops, then yarn over and pull through the remaining two loops.
Before You Begin
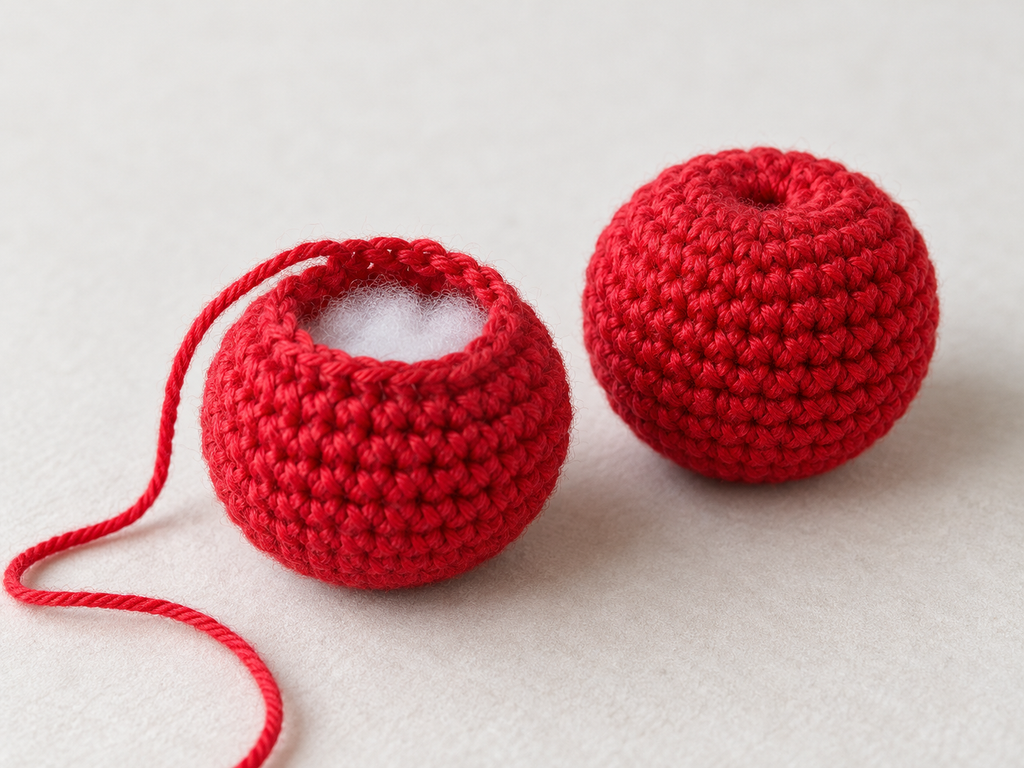
Work each cherry body in continuous rounds. Do not join the rounds or chain between them.
Mark the first stitch of every round. Count your stitches after each increase or decrease round.
The first round forms the bottom of the cherry. The final opening becomes the top, where the stem will be attached.
Cherry Body — Make Two
Using red yarn:
| Round | Instructions | Stitch count |
|---|---|---|
| 1 | Work 6 sc into a MR | 6 |
| 2 | Inc in each stitch around | 12 |
| 3 | (1 sc, inc) × 6 | 18 |
| 4 | (2 sc, inc) × 6 | 24 |
| 5 | (3 sc, inc) × 6 | 30 |
| 6–10 | Sc in each stitch around for 5 rounds | 30 |
| 11 | (3 sc, dec) × 6 | 24 |
| 12 | (2 sc, dec) × 6 | 18 |
| 13 | (1 sc, dec) × 6 | 12 |
| 14 | Dec × 6 | 6 |
Begin stuffing after Round 12. Add small pieces of fiberfill and distribute them evenly. Finish stuffing before working Round 14.
Cut the yarn, leaving a tail approximately 12 inches long. Thread it through the front loops of the remaining six stitches and pull the opening closed.
Shape the Top
For a slight indentation, pass the yarn needle from the closed top through the center of the cherry to the bottom. Take a small anchoring stitch near the magic ring, then pass the needle back through the center to the top.
Pull gently until the top dips slightly. Avoid tightening so much that the cherry becomes flattened. Secure the yarn and weave in the tail.
Repeat for the second cherry.
Green Stems — Make Two
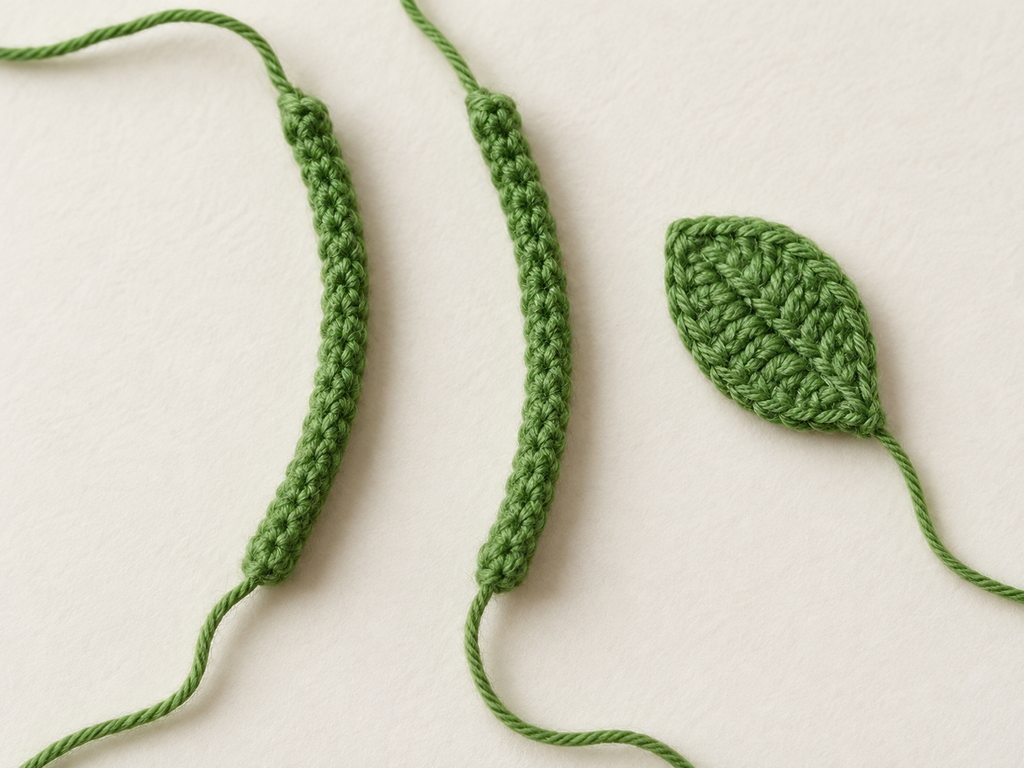
Using green yarn, leave a starting tail approximately 8 inches long.
- Ch 16.
- Starting in the second chain from the hook, work 1 sl st into each remaining chain: 15 sl sts.
- Fasten off, leaving an ending tail approximately 8 inches long.
This makes a narrow crocheted stem. Repeat for the second stem.
Check that the stems are flexible enough to arrange but firm enough to hold their shape. If they curl strongly, ease them straight with your fingers before assembly.
Green Leaf
Using green yarn:
- Ch 7.
- Starting in the second chain from the hook, work: 1 sc, 1 hdc, 1 dc, 1 dc, 1 hdc, 1 sc.
- Ch 1 and rotate the piece to work along the unused loops on the opposite side of the foundation chain.
- Work back toward the starting end: 1 sc, 1 hdc, 1 dc, 1 dc, 1 hdc, 1 sc.
- Sl st into the first sc.
The leaf has 12 stitches around its outline, excluding the turning chain and joining slip stitch.
Fasten off, leaving a tail for sewing. Weave in the starting tail.
Assemble the Cherry Pair
Attach the Stems
Choose one end of each stem as its lower end. Use the tail at that end to sew the stem into the indentation at the top of a cherry.
Take several small stitches through the stem base and cherry fabric. Secure the yarn and weave in the remaining tail.
Join the Upper Ends
Bring the free ends of the two stems together. Overlap approximately the last two stitches of each stem.
Using one remaining green tail, sew the overlapping ends together. Keep the joins compact so the two stems branch naturally toward their cherries.
Secure both tails and weave them into the stems.
Add the Leaf
Place the leaf base over the joined upper ends. Sew through the leaf base and the stem junction several times.
Leave the rest of the leaf free. Weave in the remaining yarn.
Tips for a Neat Finish
- Match your tension. Both cherries should be similar in size.
- Stuff evenly. Overfilling can stretch the stitches and distort the fruit.
- Shape gently. A small top indentation is enough.
- Secure the stems. Sew through several stitches at each attachment point.
- Check every angle. The stem junction should look tidy from the front and back.
Variations
Single cherry: Make one body and one stem, then attach the leaf near the free stem end.
Different reds: Use scarlet, deep red or burgundy for a coordinated collection.
Embroidered face: Add small embroidered features before stuffing and closing the body.
Test any changes to the yarn, shaping or construction before including them in a published pattern.
Frequently Asked Questions
Is this a no-sew cherry pattern?
No. The cherry bodies are crocheted individually, and the stems and leaf are sewn into place.
Can I change the stem length?
Yes. Adjust the starting chain and work one slip stitch into each chain after the first skipped chain. Both stems should have matching lengths unless you intentionally want an uneven pair.
Why are my stitches showing the stuffing?
Try a smaller hook, keep your tension consistent and avoid packing too much filling into the body.
Can I make larger cherries?
A thicker yarn and suitable hook will produce a larger version, but the proportions and stem firmness need checking with a sample.
Grow Your Crochet Fruit Collection
Pair these cherries with a crochet lemon to begin a colorful fruit collection. Once you have tested the pattern, record the finished dimensions, yarn usage and any adjustments so other makers can follow the project with confidence.
Looking for more inspiration? Browse all crochet patterns →