Crochet Turtle Pattern: A Small Amigurumi Turtle
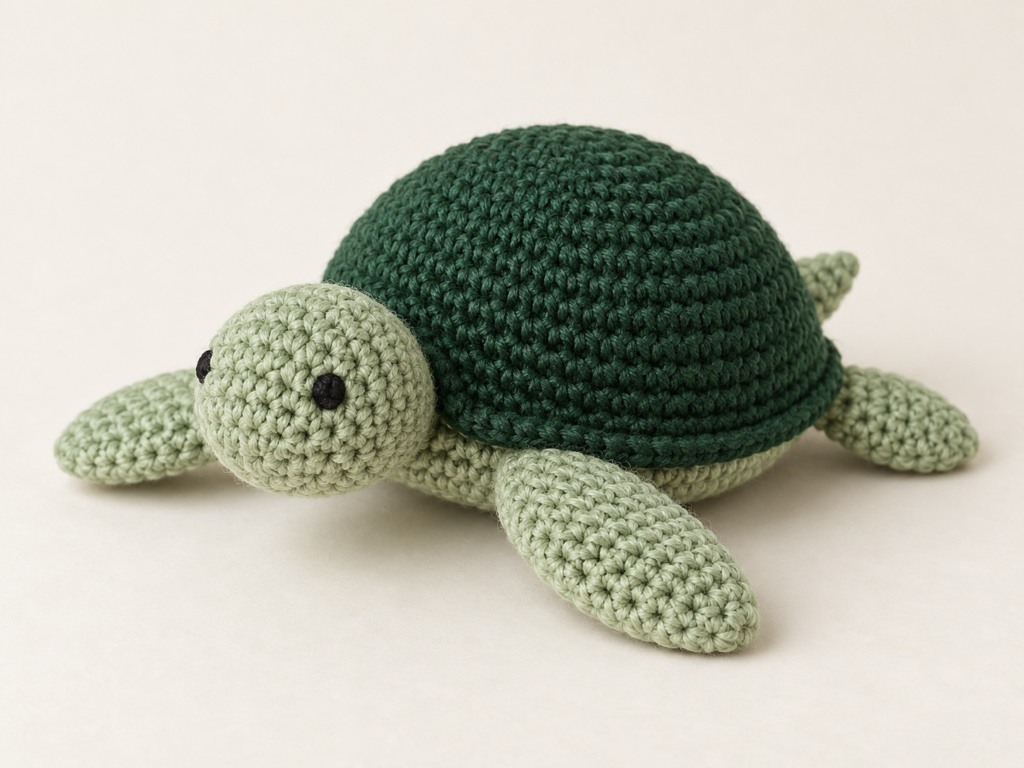
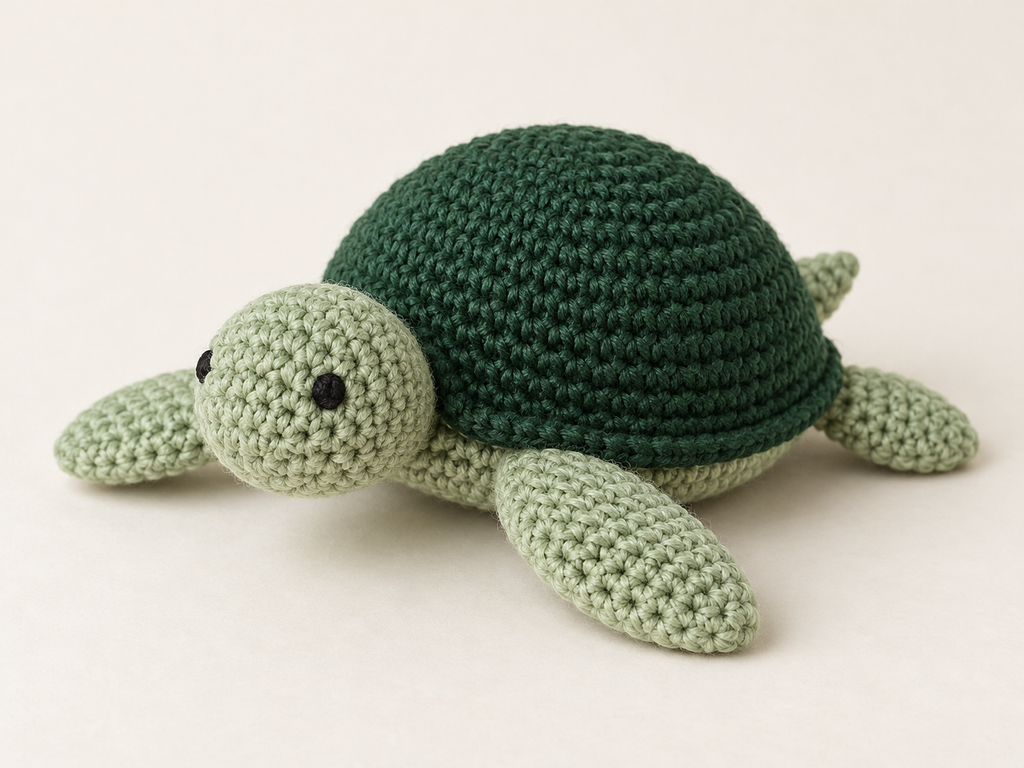
This little crochet turtle combines a rounded shell with a small head, four flippers, and a pointed tail. Use two shades of green for a natural look, or choose a contrasting shell color to give your turtle a different personality.
The shell and underside are crocheted separately, then joined around their edges. The remaining pieces are sewn onto the finished body.
Pattern status: This is an untested draft. Stitch counts have been checked, but the proportions, assembly, finished measurements, and yarn usage require a crocheted sample.
Materials
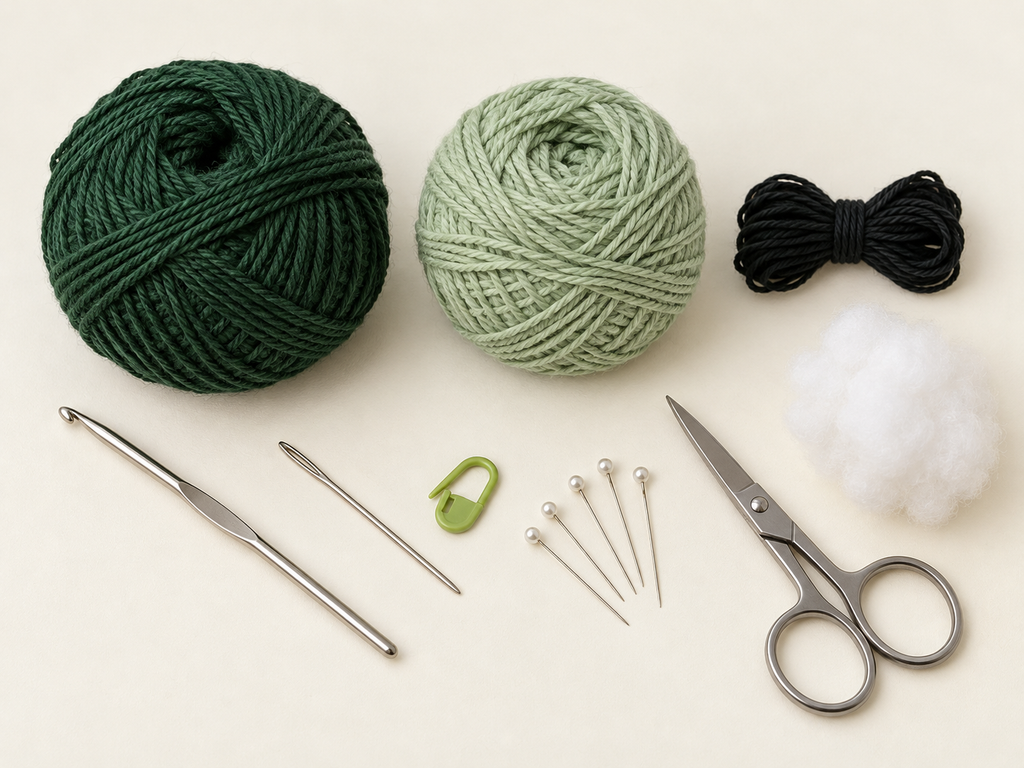
- Dark-green DK cotton yarn for the shell
- Light-green DK cotton yarn for the underside, head, flippers, and tail
- Black embroidery yarn for the eyes
- A 2.5–3 mm crochet hook as a starting point
- Polyester fiberfill
- Stitch marker
- Yarn needle
- Scissors
- Pins for assembly
Choose a hook that produces firm fabric without visible gaps. Use the same yarn weight for both main colors.
Skill level: Beginner with experience working in rounds and sewing amigurumi pieces.
Construction: Separate shell and underside joined with crochet; head, flippers, and tail sewn on.
Finished size: To be confirmed after testing.
Abbreviations
| Abbreviation | Meaning |
|---|---|
| MR | Magic ring |
| sc | Single crochet |
| sl st | Slip stitch |
| inc | Work 2 sc into one stitch |
| dec | Invisible single crochet decrease |
| st / sts | Stitch / stitches |
To make an sc, insert the hook into the stitch, yarn over and pull up a loop, then yarn over and pull through both loops.
For an invisible decrease, insert the hook under the front loops of the next two stitches, yarn over and pull through those loops, then yarn over and pull through the remaining two loops.
Pattern Notes
- Work in continuous rounds unless instructed otherwise.
- Mark the first stitch of each round.
- Repeat instructions in parentheses the indicated number of times.
- Numbers at the end of rounds show the stitch count.
- Leave long sewing tails on the head, flippers, and tail.
- The shell and underside each finish with 36 stitches so their edges can be joined evenly.
- This design requires sewing.
Crochet Turtle Pattern
Shell — Make One
Using dark-green yarn:
| Round | Instructions | Count |
|---|---|---|
| 1 | Work 6 sc into an MR | 6 |
| 2 | Inc in every stitch | 12 |
| 3 | (Sc, inc) × 6 | 18 |
| 4 | (2 sc, inc) × 6 | 24 |
| 5 | (3 sc, inc) × 6 | 30 |
| 6 | (4 sc, inc) × 6 | 36 |
| 7–9 | Sc in every stitch for 3 rounds | 36 |
Fasten off and weave in the ends. Leave the shell open.
Underside — Make One
Using light-green yarn:
| Round | Instructions | Count |
|---|---|---|
| 1 | Work 6 sc into an MR | 6 |
| 2 | Inc in every stitch | 12 |
| 3 | (Sc, inc) × 6 | 18 |
| 4 | (2 sc, inc) × 6 | 24 |
| 5 | (3 sc, inc) × 6 | 30 |
| 6 | (4 sc, inc) × 6 | 36 |
Fasten off and weave in the ends. This piece forms the flatter bottom of the turtle.
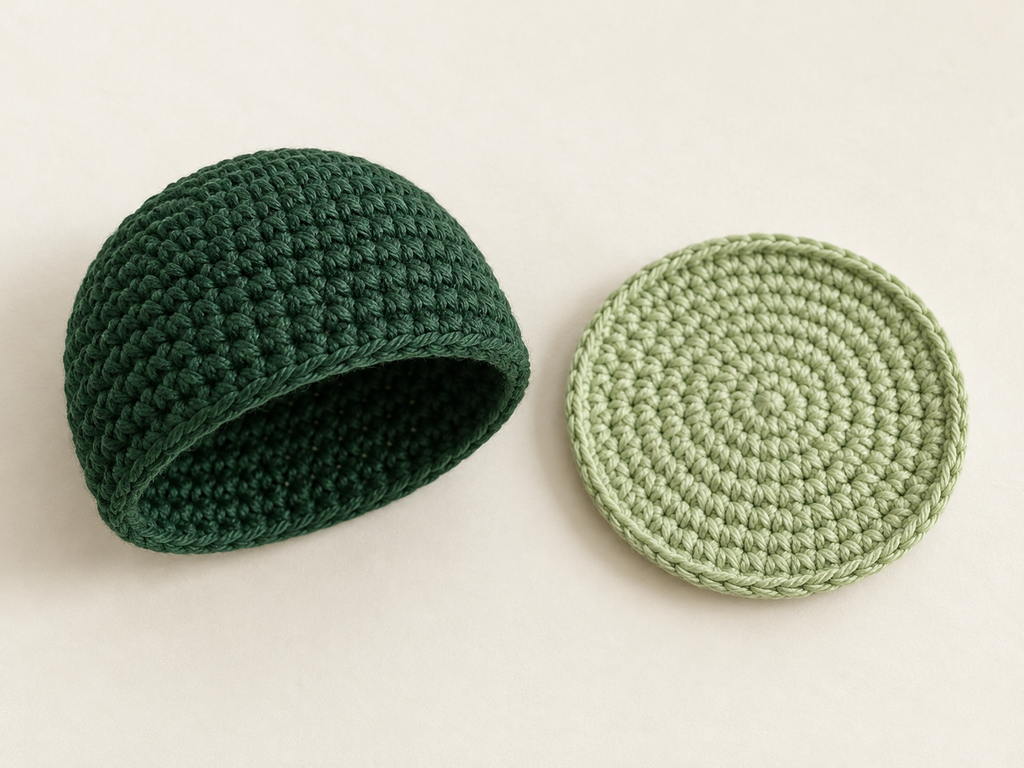
Join the Shell and Underside
Place the two pieces with their wrong sides facing each other. The shell’s dome should face upward, and the underside’s right side should face downward.
Match the 36 stitches around both edges. Use markers at several points to keep them aligned.
Join dark-green yarn through one matching pair of stitches.
- Ch 1; this does not count as a stitch.
- Work 1 sc through both loops of a shell stitch and both loops of its matching underside stitch.
- Continue around, working through each matching pair.
Pause after approximately 27 joining stitches. Add small pieces of fiberfill through the opening.
Keep the shell gently domed and the underside relatively flat. Avoid packing the body firmly.
Complete the remaining joining stitches for 36 sc in total. Sl st into the first joining sc, fasten off, and weave in the ends.
Head — Make One
Using light-green yarn:
| Round | Instructions | Count |
|---|---|---|
| 1 | Work 6 sc into an MR | 6 |
| 2 | Inc in every stitch | 12 |
| 3 | (Sc, inc) × 6 | 18 |
| 4–6 | Sc in every stitch for 3 rounds | 18 |
| 7 | (Sc, dec) × 6 | 12 |
| 8–9 | Sc in every stitch for 2 rounds | 12 |
Fasten off, leaving a long sewing tail. Leave the neck opening unclosed.
Embroider a small black eye on each side of the head, approximately between Rounds 4 and 5. Position them symmetrically, with about 6 stitches between them across the front.
Secure the embroidery ends inside. Lightly stuff the head, adding less filling near the neck opening.
Front Flippers — Make Two
Using light-green yarn:
| Round | Instructions | Count |
|---|---|---|
| 1 | Work 6 sc into an MR | 6 |
| 2 | Inc in every stitch | 12 |
| 3–4 | Sc in every stitch for 2 rounds | 12 |
| 5 | (2 sc, dec) × 3 | 9 |
| 6 | (Sc, dec) × 3 | 6 |
Do not stuff.
Fasten off with a long tail. Flatten the flipper so the 6-stitch opening forms 3 pairs. Sew across those pairs, keeping the remaining tail for attachment.
Back Flippers — Make Two
Using light-green yarn:
| Round | Instructions | Count |
|---|---|---|
| 1 | Work 6 sc into an MR | 6 |
| 2 | (Sc, inc) × 3 | 9 |
| 3–4 | Sc in every stitch for 2 rounds | 9 |
| 5 | (Sc, dec) × 3 | 6 |
Do not stuff.
Fasten off with a long tail. Flatten the opening and sew across the 3 pairs of stitches. Keep the remaining tail for attachment.
Tail — Make One
Using light-green yarn:
| Round | Instructions | Count |
|---|---|---|
| 1 | Work 4 sc into an MR | 4 |
| 2 | Sc in every stitch | 4 |
| 3 | (Sc, inc) × 2 | 6 |
| 4 | Sc in every stitch | 6 |
Do not stuff. Fasten off with a long sewing tail, leaving the wider opening unclosed.
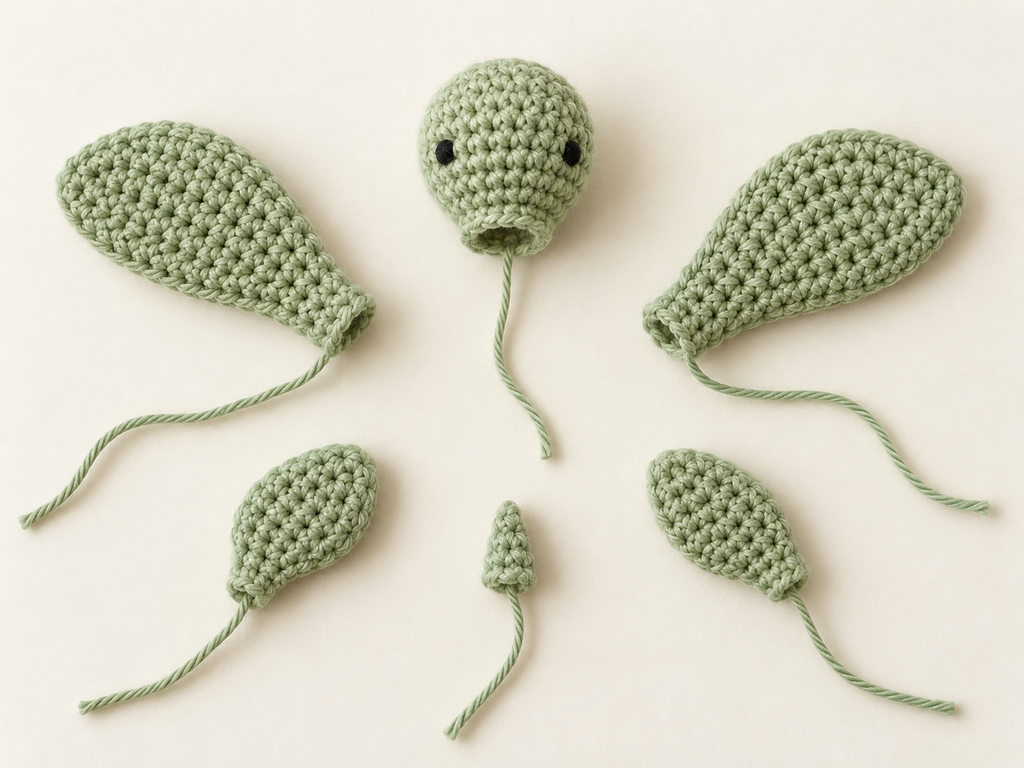
Assemble the Turtle
Pin all pieces before sewing. Choose one point on the body’s joining edge as the center front and mark it. The point directly opposite is the center back.
Attach the Head
Center the neck opening at the front of the body, just below the shell edge.
Keep the head pointing outward, with the eyes level. Sew around the neck opening, anchoring it securely to the underside and joining edge.
Attach the Front Flippers
Place one larger flipper on each side of the head, approximately 5 joining stitches to either side of the center-front marker.
Position the flattened attachment ends beneath the shell rim. Angle the flippers outward and slightly forward, then sew them securely.
Attach the Back Flippers
Place the smaller flippers near the rear, approximately 5 joining stitches to either side of the center-back marker.
Angle them outward and slightly backward. Check that their positions mirror each other before sewing.
Attach the Tail
Center the tail at the back, between the rear flippers. Sew its open base beneath the shell edge, with the pointed end facing outward.
The placement distances are starting points for the test sample. Adjust the pinned pieces if necessary to suit their actual size.
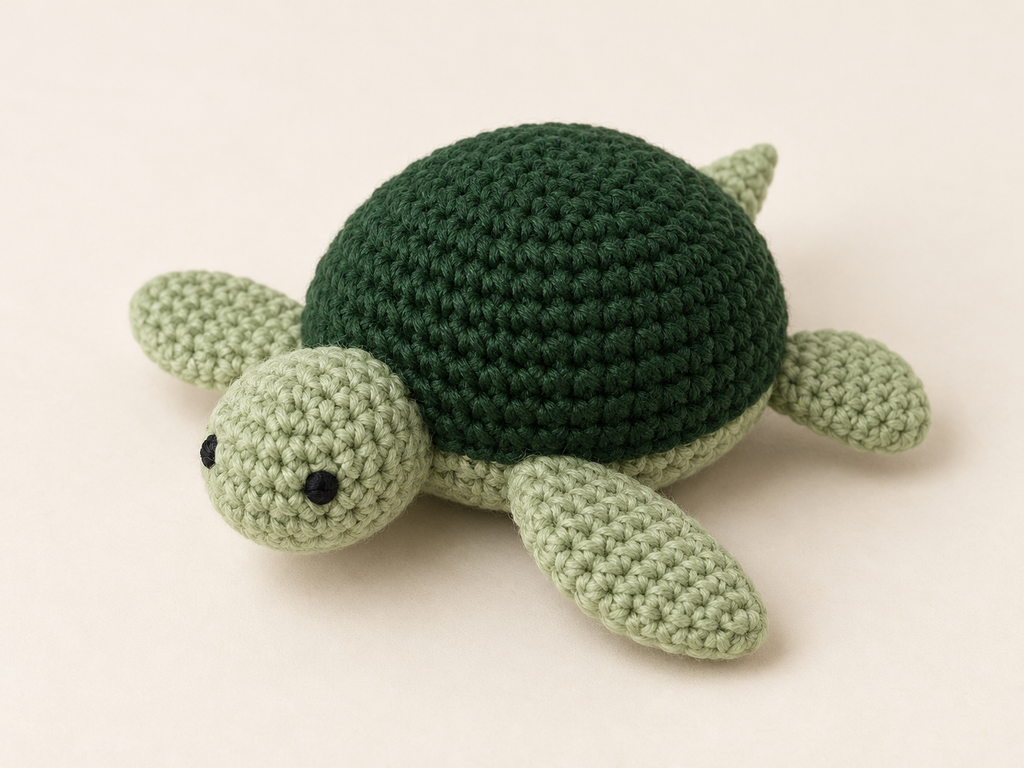
Tips for a Neat Finish
- Match the body edges carefully. Each shell stitch joins to one underside stitch.
- Keep the underside lightly filled. Too much stuffing can make the turtle rock instead of resting flat.
- Leave the flippers unstuffed. Flattening them creates a simpler paddle shape.
- Check symmetry from above. Compare the left and right flippers before sewing.
- Keep the head lightly stuffed. A heavy head may pull downward.
Color Ideas
Try a moss-green shell with a pale sage body for a muted version. A teal shell with mint flippers gives the turtle a brighter appearance.
For the first sample, change colors rather than yarn weights. Different yarn thicknesses can affect how the shell, underside, and appendages fit together.
Frequently Asked Questions
Is this a no-sew crochet turtle?
No. The shell and underside are joined with crochet, but the head, flippers, and tail are sewn on.
Can I use plush yarn?
You can try it after testing the smooth-yarn version. Plush yarn changes the proportions and makes small stitches harder to identify.
Do the flippers need stuffing?
No. They are left unstuffed and flattened.
How big is the finished turtle?
The size has not yet been confirmed. Measure the completed test sample from the nose to the tail and across the widest pair of flippers.
Can I add shell markings?
Yes, as an optional embroidery detail. Add them before joining the shell and underside so you can secure the ends inside.
Finish Your Crochet Turtle
Check each attachment, hide the remaining yarn tails, and gently shape the shell and flippers.
Looking for more inspiration? Browse all crochet patterns →