
Crochet Frog Pattern: A Cute Little Amigurumi Frog
Crochet Frog Pattern
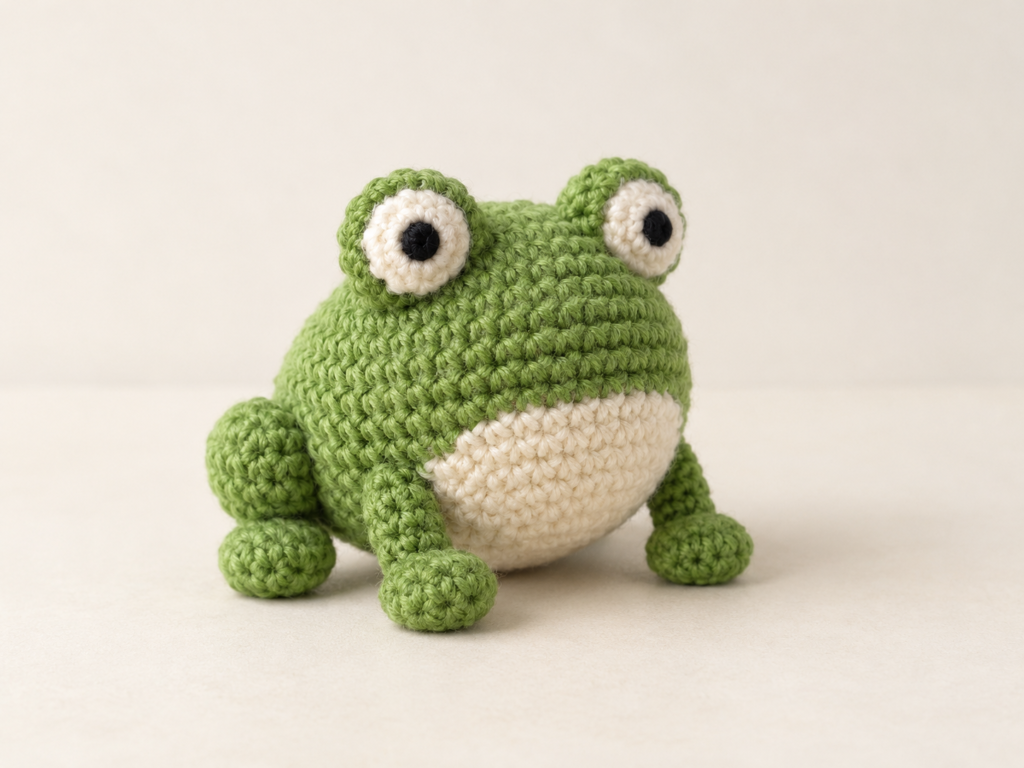
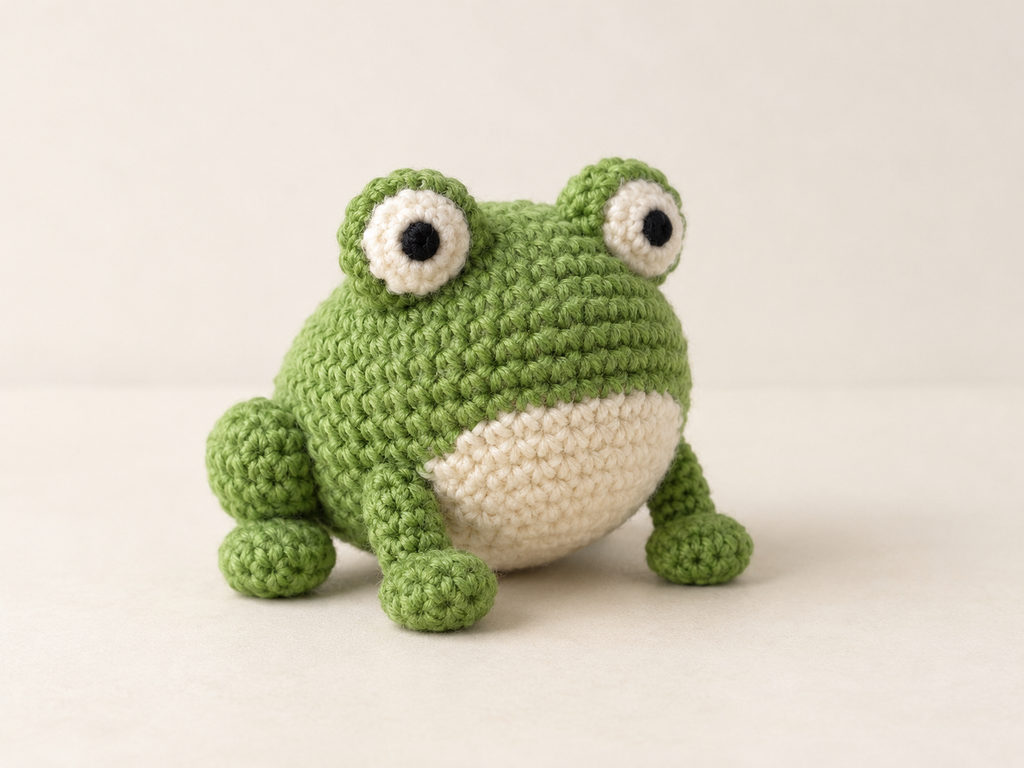
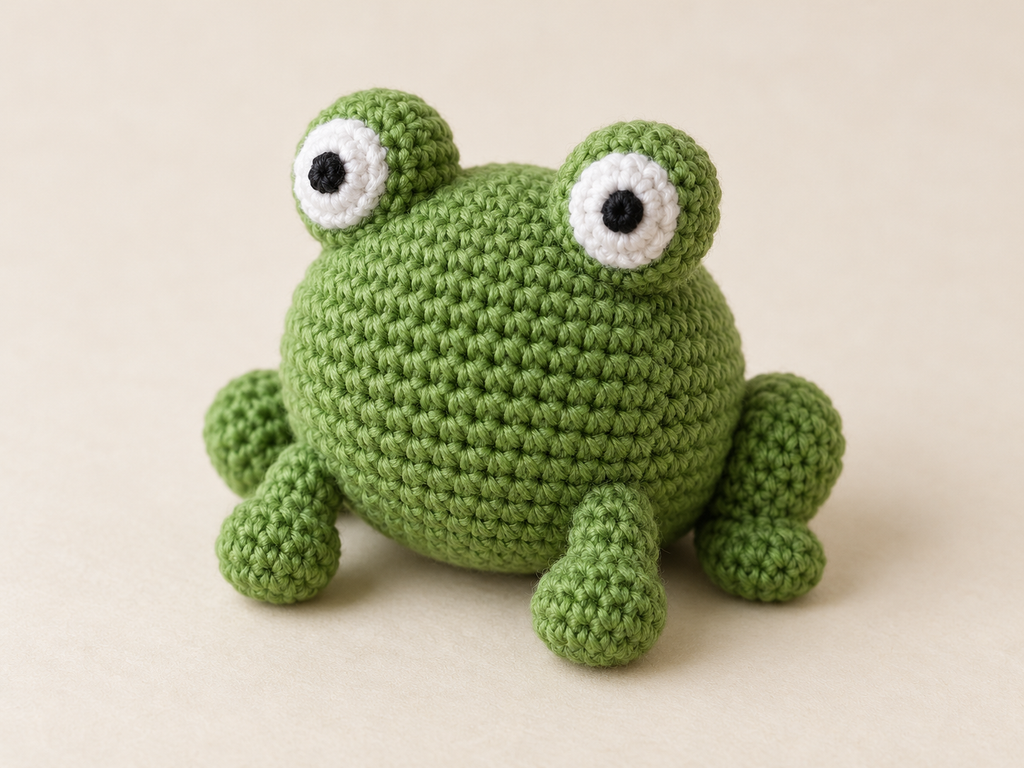
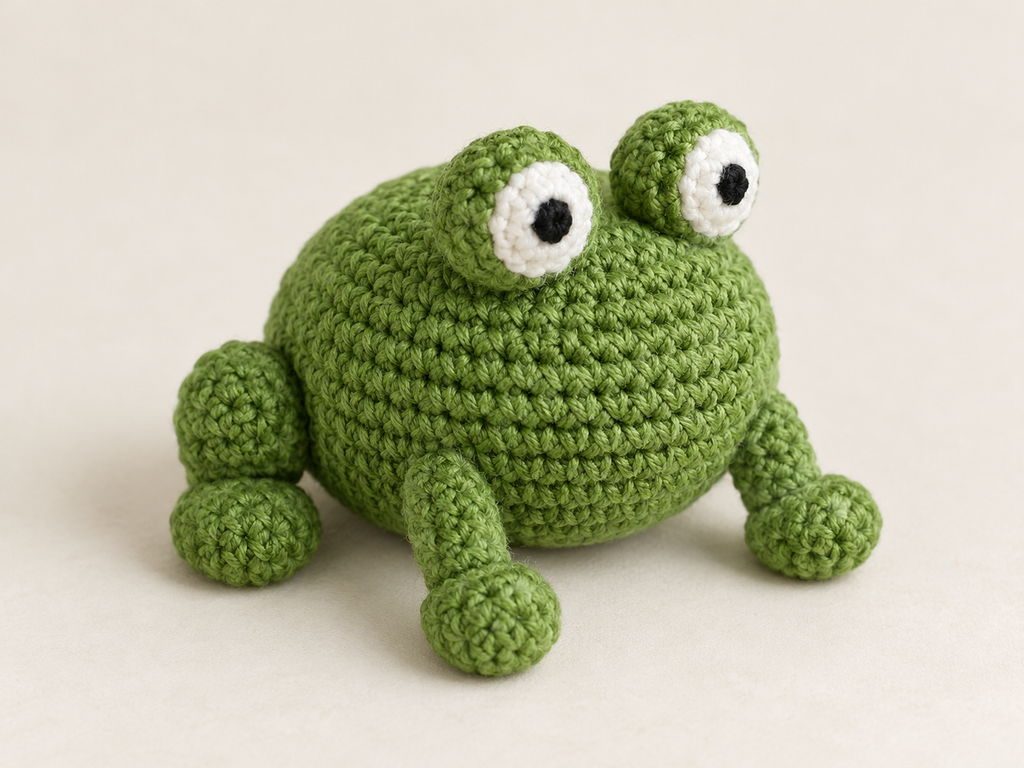
This little crochet frog has a rounded green body, two raised eyes, and four short legs. The pieces are made separately and sewn together, allowing you to adjust their placement before finishing.
The design uses basic stitches, increases, and decreases. It suits crocheters who are comfortable working in continuous rounds and ready to practice simple amigurumi assembly.
Pattern status: This is an original, untested draft. Stitch counts have been checked, but the shape, assembly, finished size, and yarn usage need confirmation from a physical sample.
Materials
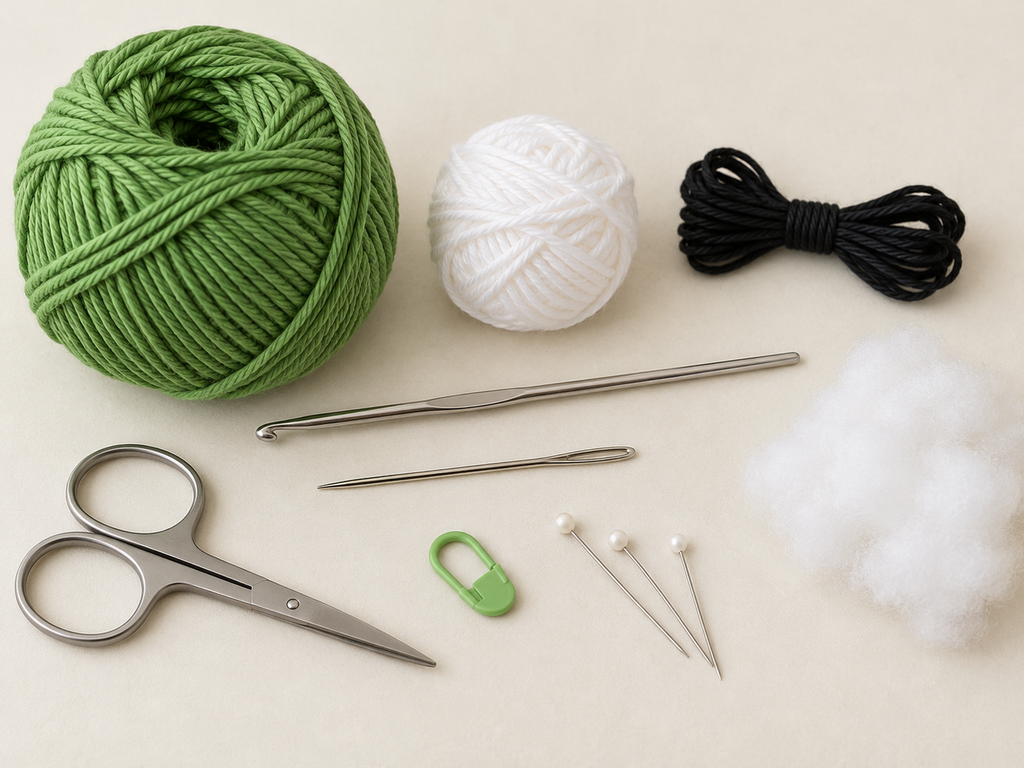
- Green DK cotton yarn
- A small amount of white yarn for the eyes
- Black embroidery yarn for the pupils and optional mouth
- A 2.5–3 mm crochet hook as a starting point
- Polyester fiberfill
- Stitch marker
- Yarn needle
- Scissors
- Pins for positioning the pieces
Choose a hook that produces firm stitches without gaps. Use the same yarn weight for the green and white pieces.
Abbreviations
| Abbreviation | Meaning |
|---|---|
| MR | Magic ring |
| sc | Single crochet |
| inc | Work 2 sc into one stitch |
| dec | Invisible single crochet decrease |
| st / sts | Stitch / stitches |
To make an sc, insert the hook into the stitch, yarn over and pull up a loop, then yarn over and pull through both loops.
For an invisible decrease, insert the hook under the front loops of the next two stitches, yarn over and pull through those loops, then yarn over and pull through the remaining two loops.
Pattern Notes
- Work in continuous rounds without joining.
- Mark the first stitch of each round.
- Instructions in parentheses are repeated as indicated.
- The number after each round is the stitch count.
- Leave long sewing tails on the separate pieces.
- The body begins at the top and closes at the bottom.
- This pattern requires sewing; it is not a no-sew design.
Crochet Frog Pattern
Body — Make One
Using green yarn:
| Round | Instructions | Count |
|---|---|---|
| 1 | Work 6 sc into an MR | 6 |
| 2 | Inc in every stitch | 12 |
| 3 | (Sc, inc) × 6 | 18 |
| 4 | (2 sc, inc) × 6 | 24 |
| 5 | (3 sc, inc) × 6 | 30 |
| 6 | (4 sc, inc) × 6 | 36 |
| 7–12 | Sc in every stitch for 6 rounds | 36 |
| 13 | (4 sc, dec) × 6 | 30 |
| 14 | (3 sc, dec) × 6 | 24 |
| 15 | (2 sc, dec) × 6 | 18 |
| 16 | (Sc, dec) × 6 | 12 |
| 17 | Dec × 6 | 6 |
Begin stuffing after Round 15. Add more before the final round, keeping the body rounded without stretching the fabric.
Fasten off with a tail. Thread it through the front loops of the remaining 6 stitches and pull closed. Weave in the end.
Raised Eyes — Make Two
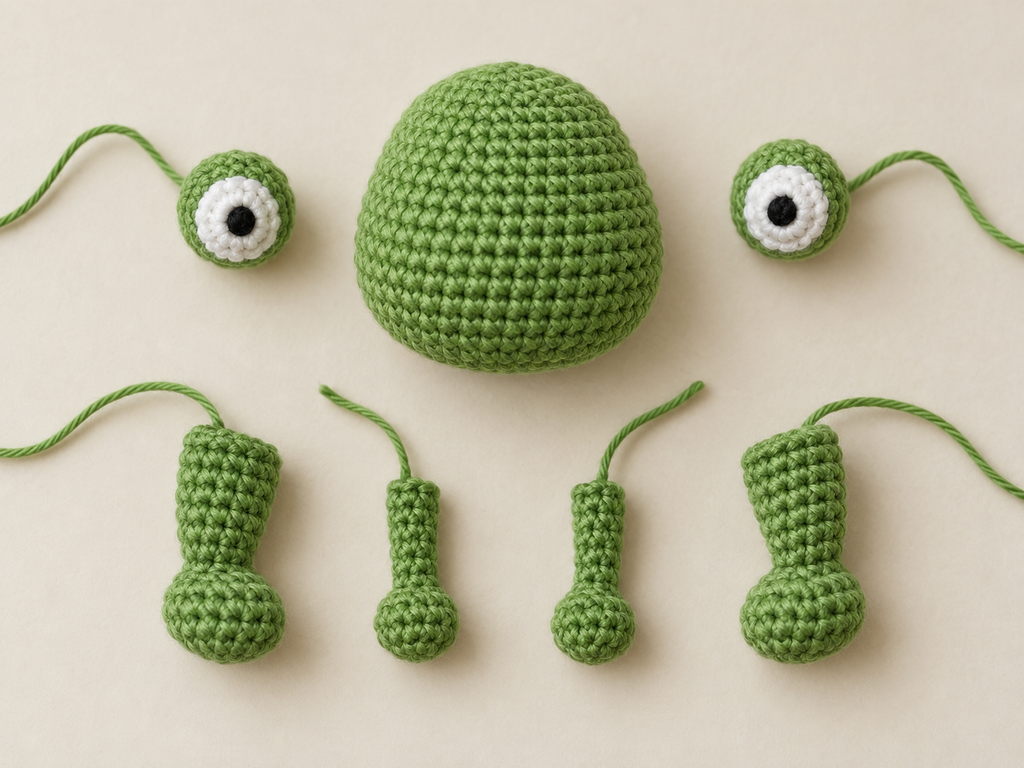
Start with white yarn. The white starting circle forms the front of each eye.
| Round | Instructions | Count |
|---|---|---|
| 1 | Work 6 sc into an MR | 6 |
| 2 | Inc in every stitch | 12 |
| 3 | Change to green; sc in every stitch | 12 |
| 4 | Sc in every stitch | 12 |
Fasten off, leaving a long green sewing tail. Leave the back opening unclosed.
Using black embroidery yarn, make a small pupil centered on the white area. Secure the embroidery ends inside the eye.
Lightly stuff each eye. Keep the white front facing outward when positioning it on the body.
Front Legs — Make Two
Using green yarn:
| Round | Instructions | Count |
|---|---|---|
| 1 | Work 6 sc into an MR | 6 |
| 2 | (Sc, inc) × 3 | 9 |
| 3–4 | Sc in every stitch for 2 rounds | 9 |
| 5 | (Sc, dec) × 3 | 6 |
| 6–8 | Sc in every stitch for 3 rounds | 6 |
Add a small amount of stuffing to the rounded foot end. Leave the narrow upper section unstuffed.
Fasten off with a long tail. Flatten the 6-stitch opening and sew across it, pairing the stitches into 3 pairs. Keep the remaining tail for attaching the leg.
Back Legs — Make Two
Using green yarn:
| Round | Instructions | Count |
|---|---|---|
| 1 | Work 6 sc into an MR | 6 |
| 2 | Inc in every stitch | 12 |
| 3–5 | Sc in every stitch for 3 rounds | 12 |
| 6 | (2 sc, dec) × 3 | 9 |
| 7 | (Sc, dec) × 3 | 6 |
| 8–9 | Sc in every stitch for 2 rounds | 6 |
Lightly stuff the wider foot end, leaving the narrow attachment section unstuffed.
Fasten off with a long tail. Flatten the opening and sew across the 3 pairs of stitches. Keep the remaining tail for assembly.
Assemble the Frog
Attach the Eyes
Place the body with its starting magic ring at the top and its final closure underneath.
Pin the eyes side by side on the upper front of the body, approximately across Rounds 3–6. Start with about 2 body stitches between them and adjust until they look balanced.
The white sections should face forward. Sew around each eye’s open green edge, securing it to the body. Add a little more stuffing before completing the seam if needed.
Attach the Front Legs
Pin the front legs to the lower front of the body, approximately across Rounds 11–14.
Place one on each side of the center line, with the feet pointing forward and downward. Sew the flattened upper ends securely to the body.
Attach the Back Legs
Position the wider back legs on the lower sides, slightly behind the front legs, approximately across Rounds 12–15.
Angle the feet outward. Check both sides before sewing so the frog’s pose looks balanced.
These positions are starting points for the test sample. Adjust them to suit the actual proportions of your crocheted pieces.
Add an Optional Mouth
Using black embroidery yarn, add a small smile below the eyes. Keep the stitches short and avoid pulling tightly enough to dent the body.
Weave in all remaining ends.
Tips for a Neat Finish
- Pin every piece before sewing. Check the frog from the front, sides, and above.
- Keep the eye stuffing light. Overfilling can distort the white circles.
- Match the leg placement. Compare the left and right sides before finishing the seams.
- Stuff the feet more than the attachment ends. Flexible upper sections are easier to position.
- Use small sewing stitches. Catch the body stitches securely without pulling the pieces out of shape.
Frequently Asked Questions
Is this a no-sew crochet frog?
No. The eyes and four legs are made separately and sewn onto the body.
Can I change the color?
Yes. Mint, olive, or teal can give the same design a different appearance without changing the stitch instructions.
Can I use plush yarn?
Try smooth yarn for the first sample. Plush yarn changes the proportions and makes stitches harder to identify, so that version needs separate testing.
How big is the finished frog?
The size has not yet been confirmed. It depends on the yarn, hook, tension, and stuffing. Add measurements after completing the test sample.
Will the frog sit upright?
The rounded body and leg placement may allow a seated pose, but stability needs checking on the physical sample. Adjust the pinned legs before sewing.
Finish Your Crochet Frog
Check that the eyes and legs are securely attached, the embroidery is tidy, and all yarn ends are hidden.
Before publishing this as a tested pattern or selling a PDF, crochet a complete sample, confirm the assembly positions, record its size and yarn usage, and photograph the actual construction steps.
Looking for more inspiration? Browse all crochet patterns →